Showing posts with label Craftiness. Show all posts

Friday, September 21, 2012

Forever Young Infininty Scarf Tutorial

I love the song "Forever Young" by Bob Dylan.

But, I have a confession...I never actually knew this song until the TV show Parenthood used it as their opening theme song.

Nonetheless, love is love.  I love it.

So much so, that I decided to incorporate it into one of my handmade Christmas items this year.

Enter:  The Forever Young Infinity Scarf

Yes, infinity scarves have been done before and will continue to be done forever, I'm sure.  I didn't say this was a brand-spankin' new idea here folks.  But I did take two ideas previous pinned here and here (Thanks again, Pinterest) and meshed them into my own creation.

I have somewhat of a list going of friends and family for whom I want to make some sort of Infinity Scarf- whether the Kid Art one posted previously, or one with writing like today's scarf.  So, last night while catching up on the most recent episode of Parenthood (thank you Hulu for keeping this island girl up with the times!), it hit me!  I knew I wanted to use the lyrics from the song "Forever Young" for one of the scarves.  I even knew exactly who I wanted to give it to.  (She doesn't read blogs, or Pin anything, so I'm safe in posting...mwahaha!)

The steps are super easy, as you probably already know:

Cut your shirt to the desired width (I chose a thinner width for this scarf and *still* fit the lyrics to the song twice!), put a piece of cardboard inside to prevent bleeding and get to writing:
*I think I have decided that it is best to turn the shirt inside out before writing.  Both the scarves I have done this week seem to curl to where you cannot see the side you draw/write on.  I'm going to test this on my next one, but just something to think about*

Once you are finished writing, stretch the heck out it.  The longer you stretch it out, the skinnier it will be.


I really like the skinny look for this scarf.  I think a bulky scarf with this much wording would be too over powering.  But now, it is the perfect accessory to complete an outfit.  I can't say we wear many scarves on Saipan, but my friend doesn't live here and I can see her using this to dress up a tee, go casual with a cardigan or anything this fall.

I really love to give thought out, hand made gifts.  I hope you are inspired to start working on a creation of your own!

"Forever Young"

May God bless and keep you always
May your wishes all come true
May you always do for others
And let others do for you
May you build a ladder to the stars
And climb on every rung
May you stay forever young
Forever young, forever young
May you stay forever young.

May you grow up to be righteous
May you grow up to be true
May you always know the truth
And see the lights surrounding you
May you always be courageous
Stand upright and be strong
May you stay forever young
Forever young, forever young
May you stay forever young.

May your hands always be busy
May your feet always be swift
May you have a strong foundation
When the winds of changes shift
May your heart always be joyful
And may your song always be sung
May you stay forever young
Forever young, forever young
May you stay forever young.

Tuesday, September 18, 2012

Kid Art Infinity Scarf Tutorial

Christmas has been on my mind a lot lately.  It may seem early (even for me), but when you add in shipping time from Saipan, as well as the shopping and shipping time from my Mom/Sister when I need certain craft items, it's really not that bad.  Also, I have this unrealistic hope of having most (if not ALL) Christmas gifts ready before Titus comes at the end of next month.

This year (as much as it pains me since I love gift giving), we are going minimal on gifts.  The reasons for this are pretty basic--Saipan has very little to offer as far as gifts go (except for extremely touristy items, which no one wants), we have limited funds with which to purchase gifts, and I have way too many Pinterest craft ideas on my "Want to do" list.

So, Emilia and I have been working on the projects that involve her.  She LOVES to help on a project and she is getting to the age where she actually IS a help.  ;-)  Originally I saw this idea on Pinterest for personalized handwritten scarves.  I loved the idea right away because they aren't completely legible when worn, but they would have special meaning to the giver and the recipient. 

My next challenge was finding a way that Emilia could help make them for certain family members.  Some of my family members are more crafty/artsy than others, so I knew they would appreciate (and actually *use*) this gift.  Since Emilia cannot write yet (except for her name), I decided to lay out all our colorful permanent markers and let her go to town.  She had a blast!


Supplies:

1 Plain White T-Shirt (we used XL)
Scissors
Permanent Markers of your choice


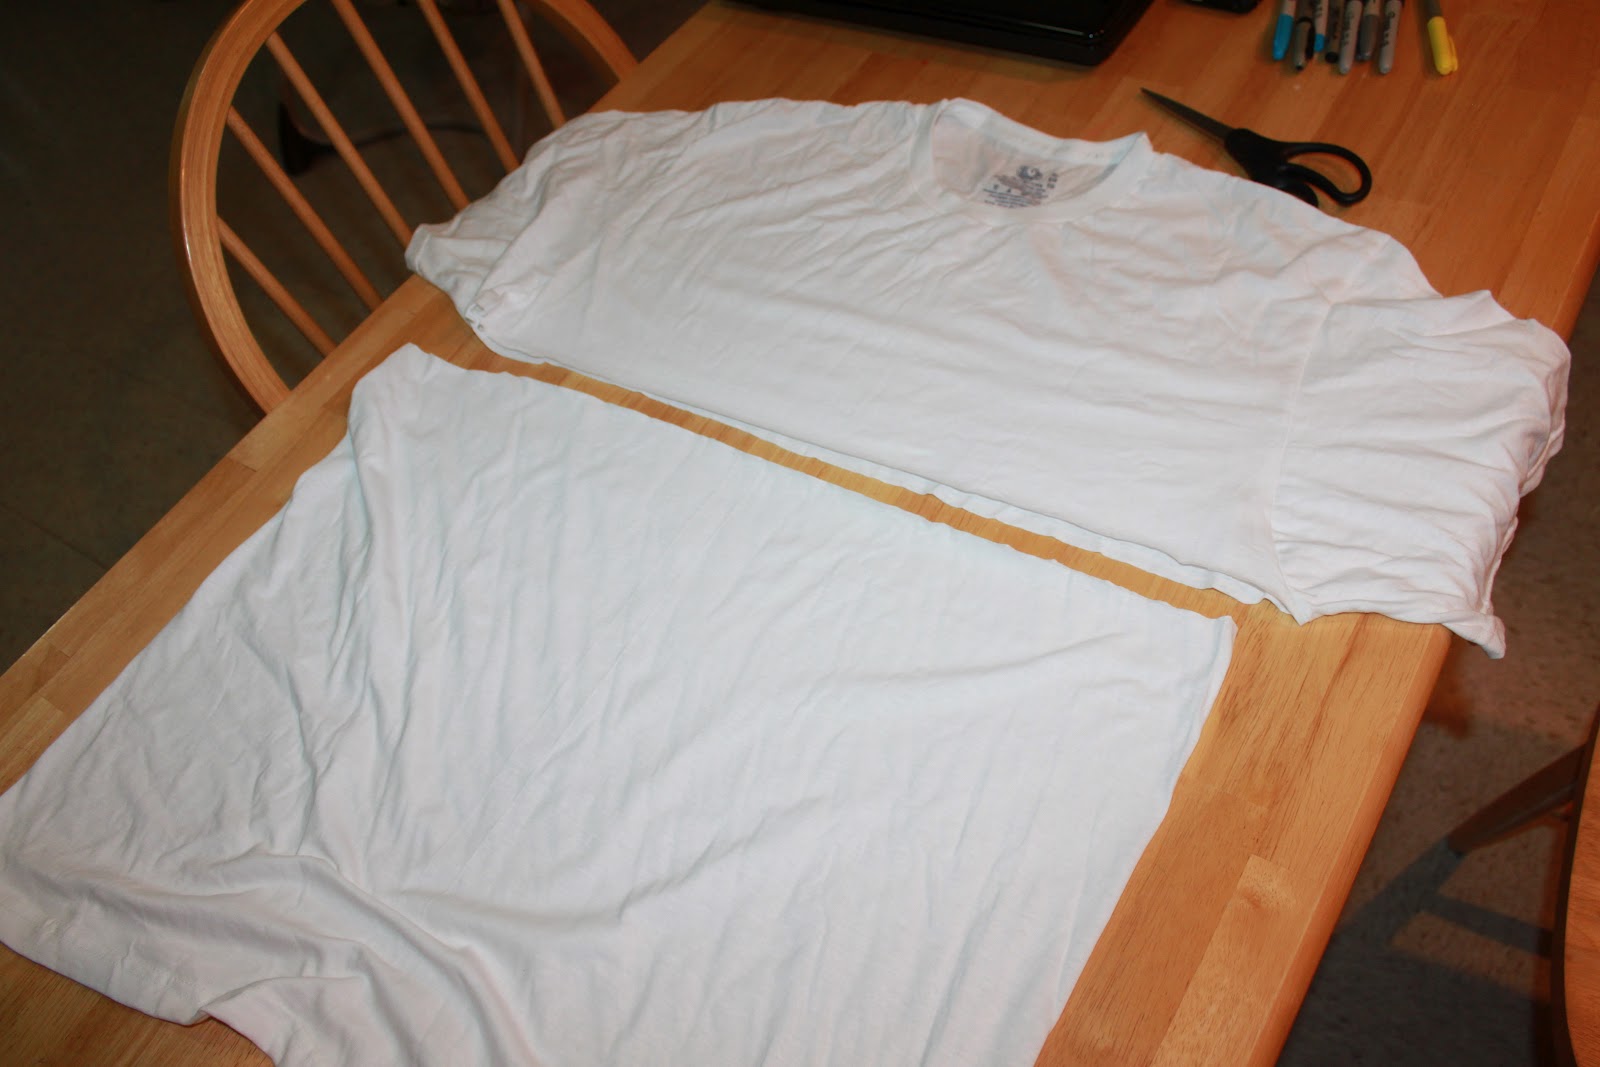
Step One:  Cut your shirt just below the armpits

Step Two:  Let your kid go to town!  *Important suggestion which I didn't initially do...lay down a piece of card board, or you'll end up with this:
 
Step Two Redo:  Lay down a big piece of cardboard on the floor, and let your kid go to town! 


Step Three:  Cut the bottom hem of the shirt off:


Step Four:  Stretch, stretch, stretch!  I had a 3-year-old helper, but if you don't, but one end around a chair or your feet or whatever works for you.


Voila!

She wanted to test it out..I think it got her approval! ;-)


This type of gift might not suit the taste of everyone (or anyone) on your list, but I know it is going to be very well received by the family members we are giving them to.  (Sorry for being so vague...they don't usually read this blog, but just in case!)

Thursday, May 17, 2012

Small Style :: Refashion Victory

As it goes with almost any crafter I know, the "crafts to do" pile is ever-growing and the "crafts completed" pile stays rather short.  It doesn't help that we are in the middle of packing, shipping, selling and storing all our belongings for the move to Saipan.  Add to that the sewing machine I am borrowing from my mother-in-law is older and I have trouble getting it to cooperate with certain stiches (read: I don't know exactly how to operate it except for straight lines...).

That being said, please share in my excitement over the toddler tee to dress refashion I actually completed recently!  This was one of many projects I hauled to my momma's house (and her fancy-pants sewing machine) a couple weeks ago.  I am proud to say I completed every. single. project. I brought with me that day! (O:

This is Miss Emilia on Mother's Day:
Her dress and hairbow were both handmade by me. 

The tshirt necklace was made by Emilia and her Aunt Clare. ;-)

The only part of her outfit that wasn't handmade are these adorable pink peeptoe sandals.  They were part of a sweeping victory I had last year at the Gap Outlet.  I purchased over 10 pairs of sandals and flip flops for under $2 a pair!  (I had to wait SO LONG for these to fit, haha!)


Daddy can always make her laugh and smile. (O:

(I'm not exactly sure what this pose was about, other than being done with my mini photo shoot.)


If you are interested in making one of these adorable little dresses for your little sweetheart, this is the PIN I followed for easy instructions.

My sister is much craftier than I, so she already knew how to make the necklace.  But, for those of us who need to see how it's done, this tutorial seems pretty easy to follow.

I am linking up to Mama Loves Papa's Small Style again this week.  (O:

Tuesday, March 6, 2012

Manic Monday

I have a friend (who blogs here) but who also had an old blog on which she usually posted a "Manic Monday" post.  This post always seemed so fitting because no matter what the state of one's weekend was, by Monday it all seems to have been a blur.  This past weekend was no exception for me.

After working 6-4 Tuesday thru Friday last week to make up for Monday's sick day, I was totally pooped.  But, Jason asked to take Emilia and I out on a little family date and even agreed to stop at a fabric store for a few supplies I needed (wow!).  We went to the mall food court for dinner because we love Chick-fil-A.  It was a wonderful evening spent together laughing at E's newest quirks and funny statements, holding hands, chicken and fabric.

I had high hopes of sleeping in LATE on Saturday, but Emilia had other plans for me.  She was in our bed by 7...but after waking at 4a.m. each day last week, that was still technically sleeping in.  ;-)  We bounced downstairs, arms full of all the supplies we needed to start working on her "Rosetta dress"- which is actually a tutu style skirt.  I really had no idea how I was going to put this thing together, but I knew I wanted it to look similar to the skirt Rosetta wears in the Tinkerbell movies.  So far, I *love* how it is turning out!  Unfortunately, my borrowed sewing maching started acting up with only 2 layers of petals remaining to sew...bummer.  But, I at least had it somewhat constructed and one layer of petals attached so Emilia could test it out after naptime.  Success- she loves it!  She says it is a beautiful Rosetta dress, so I think that is a win.  I want to wait until it is finished (as well as a coordinating shirt) before I post photos, but be excited.  Her fairy party is going to be SO fun!! (O:

Saturday afternoon we headed for Cape Girardeau for two church visits on Sunday.  We were very fortunate to have a Warren relative (don't ask my what relation..) open her home to us so we didn't have to pay for a stay in a hotel.  She was actually out of town for the weekend, but still let us stay.  It was weird but great.  Weird to be in a home we had never been to and felt odd searching for the right rooms to sleep in as well as tracking down the linen closet (luckily, it was IN the bathroom). ;-)  But nice to have a quiet place to ourselves for the night as well as an all-family naptime between the morning and evening services on Sunday.  Not to mention the amazing Barbie dream house she had in the play area of her basement (for her grandkids).  This wasn't a cheap-o plastic house, someone constructed it out of wood, complete with working Elevator!  Emilia (and I) were in awe!

Sunday was a whirlwind of a day, but we definitely feel blessed to have had the opporunity for these visits.  The morning church, Connection Point Church in Jackson, MO, was so welcoming and friendly.  We added 17 new committed shares, 7 additional prayer partners, as well as a substantial amount in donations to the general fund (which covers our plane tickets, shipping, etc.)  We were taken to lunch at a local BBQ place (yum!) and had just enough time for a quick nap before heading to the evening church in Scott City.   1st General Baptist Church was holding their Association's local meeting that night and had a youth-oriented service after dinner.  It was so refreshing to see all the young people of these churches coming together and putting on skits and other dramas for God's glory.  I love seeing passion in our youth!  Jason was given 20 minutes to speak and he did a great job.  We had a number of people come back and take Share Cards to look and pray over at home.  We left Scott City around 8:20p.m. and after one dinner stop (me) and one potty stop (Emilia), we made it home close to 11.

I am dragging this morning, but feeling incredibly blessed.  I am often asked if I am scared about moving so far away.  But honestly, I just feel honored and very very blessed to have been called to Saipan.  God is teaching me to trust His will and follow where He leads.  I cannot imagine being scared of these wonderful things God has planned for us.

Saturday, February 25, 2012

The Pirate Ruffle Tank :: Tutorial

It is no secret that I *love* ruffles and upcycling shirts...today's post plays right into these loves. 

This past weekend, Emilia and I spent All Day at my Momma's house- yay!  My sister, mom and I spread out all different crafty projects across Momma's dining room table and even E helped on a project or two. ;-)  My main objective of the day was to sew two t-shirt skirts (which I plan to post about once I finish taking photos!), but they are a super quick and easy project so I ended up with extra time on my hands.  Luckily, my crafty bags were stuffed with other projects waiting to be completed (including a bag of 8-10 tees/tanks just calling out to be ruffled!). 

I found some really cool white shiny fabric (how's that for a technical term) and used some extra scraps from one of my skirts for the ruffles.  I grabbed out a plain grey tank I found on clearance at Target- it is their C9 brand with moisture wicking technology.  I am in love with this line- the clothes are comfy and cute and don't hold sweat like regular tees (TMI?  Maybe..)  Anyway, I have this plan to refashion a handful of these tanks to use on Saipan.  That way I am cool and comfy, but don't always look like I'm going for a run.  So this is what I came up with:


Supplies:

1 tank/tee
Scrap fabric or another tank/tee for the ruffles
Rotary cutter and board
Scissors
Pins
Sewing machine with coordinating thread

I had it in my mind that I wanted to do a layered ruffle along the neckline of my tank, so I started cutting out strips of each fabric.  I cut the grey fabric in 2in strips and the white fabric in 3.5in strips because it was going to be folded over.  I don't have an exact length of fabric needed in each color because this was kind of an "experiment as I go" type of piece, and it will also depend on how ruffled you want your strips.  You can always start out ruffling some fabric and then ruffle more as you need it.

To gather the fabric, I lengthened my stitch as far as I could (I think a 5 on my mom's machine) and loosened the tension a tad.  It is best to practice on a piece you won't be using to make sure your settings will work as you want them to.

For the white fabric, I folded it in half long-ways and stitched along the raw edges.  This fabric was fraying a LOT so I knew I couldn't leave the raw edges exposed on my shirt.  The grey strips were just sewn down the middle.  *Do not back stitch at either end or you won't be able to gather*  Once you finish stitching a strip, gently pull on one of the threads (I think the bottom works easier), shifting the fabric as needed until you create the desired amount of ruffly goodness.

Starting with my white fabric, I pinned it along the top edge of my tank neckline, like so:

(Notice the raw edges are pointing down from the neckline)

(If you do not have long piece of ruffle, as was the case for me, make sure to tuck the ends together when starting a new strip.  This makes it look continuous.)

*Change your machine setting back to normal before sewing your rows on the shirt.*

Sew the first row of ruffles to the tank, along the seam made from gathering, back stitching at the beginning and end.  Be careful not to sew through both layers (this will be important as we continue to add rows).

I really started to notice how badly this fabric was fraying after pinning and sewing this first row.  So I decided to pin the next row of white before adding the middle layer of grey.  That way my grey layer would hopefully keep most of those frayed edges contained.  This white row has the raw edges facing up and overlapping the first white row a little bit.  Pin into place and sew.


Now pin the grey strip between these two white rows.  Sew into place.  (The grey fabric will curl more once it has been washed.)


This is what we have so far!  Originally, this is what I was picturing in my mind...but wasn't in love with it once I put it on.  My mom and sister said they thought it was cute...but who were they trying to kid??  Something looks off, don't you agree? 


Hey, let's add more ruffles!  Following the same steps as before, I ruffled more strips and started adding the next couple rows to the tank.  You can play around with the shape, number of rows, etc. until you come up with something you like.

Tuck the ends of these next rows under the previous layers for a more finished look.
(Make sure your next layer is centered...unless you are going for an off-center look!) ;-)

 I opted for two rows of white as the bottom instead of just one.  I wanted a little extra fluff.


Keep pinning and sewing rows of ruffle until you have a shape/style you like.


And Done.


I still think it has a pirate-y feel to it, but I am OK with that.  We all need a little pirate in our lives, right? ;-)  Have fun working up your own ruffly creation.  I would love to see what you create! (O:

Have a great day! (O:

Friday, February 17, 2012

My T-Shirt Ruffle Refashion (PDLB!)

My latest Pinned It, Did It, Loved It, Blogged It moment.  Enjoy! (O:


I have been dying to make one of the several ruffle tees and/or tanks I have pinned over the past few months.  I have a great love (borderline addiction) with all things ruffly and actually have a stack of about 10-15 tees and tanks just waiting to be refashioned with ruffles.  Last week I decided it was TIME.  I have waited long enough.  I have worked on enough projects for others.  It was time to work on something just for me.  (This is also the same day I worked up 3 new scarves, one of which can be viewed here.  The others to follow sometime soon.)  I haven't seen any other ruffle refashions done this way using a patterned shirt, and I am really happy with how it turned out.  I hope the ruffles curl up a little in the wash; they are a little big for my liking.  But overall, I am pleased with this shirt and it really wasn't very difficult to put together!

Being a fairly Plain Jane kind of girl, I didn't stray from this color palette when choosing my buttons.  I did throw in a little funk by alternating squares and circles...I'm such a risk taker. ;-)

(Please forgive my sideways photos...My editing software and blogger are not agreeing today.)


Note:  I did not use the technique of sewing my buttons on with my machine.  I simply sewed them by hand while I finished watching Bride Wars. They didn't take long and I could hear the movie better! (O:


I am the first to admit that I am not always that creative- my strong suit lies with executing ideas.  So to give full credit where credit is due, I used the following two tutorials for my wonderful new shirt:

My first Pin links to a tutorial at Bunch of Scrap.  She is down to earth and lays out detailed instructions and helpful hints.  Her refashion is made up of 2 short sleeve shirts found on clearance.

My second Pin links to a tutorial at Ruffles & Stuff.  (What a great name!) (O:  Her instructions are equally great.  I decided to go with her 3 inch ruffle strips because I didn't want them too large on my shirt.  Her refashion is made from one long sleeve shirt- using the sleeves to make the ruffles.

Hopefully this might inspire you to try your own version of this, or any, ruffle refashion!  Have a great day! (O:

Tuesday, February 14, 2012

Infinity Scarf from a T-Shirt :: Tutorial (PDLB)

This is my latest Pinned it, Did it, Loved it, Blogged it success and I love it!!


I have had this idea pinned for a couple of weeks and kept forgetting to just DO it.  As soon as I saw it, I knew exactly which shirt I wanted to use.  It was a super fun patterned shirt I found on clearance, but hardly ever wore because it never kept its shape throughout the day.  Enter: new scarf!  This is seriously the easiest infinity scarf E.V.E.R.!  It is one of those things that will make you go, DUH!  Why did I think of that!?  The instructions are as easy as Shannon @ Madigan Made lays out in her tutorial.

What you need:
One T-Shirt
Scissors

Directions:


Voila!
 

Note:  The thinner and stretchier (if that's a word) your shirt is, the better curl it will provide upon stretching.  My shirt was not very thin or stretchy, so it did not curl very much.  I still really like it and just rolled the ends in a little by myself.  Enjoy! (O:

Saturday, February 11, 2012

Personalized Photo Valentine's Day Card

I am a big fan of personalizing cards and gifts as often as possible.  Why mail out cheap cardstock Disney Princess cards for Valentine's Day when I can just as easily create my own card to send?  So that is exactly what I did!  Here is what I will be sending out to Grandparents this weekend:


These photos are from a little session I did with Emilia last fall, to showcase my final product as part of the Scrap Tutu Tutorial I put together.  I wanted to make the most of our time playing at the park, so I grabbed a couple extra props and planned to take extra photos for other projects.  Thinking ahead to Christmas and beyond, I put together the little sign she is holding.  It is just a piece of white posterboard and letter cutouts (both can be found at your local dollar store).  One side, as you can see, says "I Love You" and the other side says "Joy. Peace. Love".  (That side was, of course, for our Christmas photo card.)  To stabilize these against a bouncy 2.5 year old, I taped the signs to either side of one of our wooden puzzle bases.

I love the bright, cheery colors of Emilia's outfit and her bubbly, fun personality really shined during this session.  I picked out a couple favorite shots and then headed over to Picnik to start putting my card together.  (I know I have said this before, and I will probably say it again, but I'm so sad this site is shutting down in April.  I love using it for quick fix-ups- it's super user friendly and quicker than fumbling around in Photoshop.  Take a few minutes and check it out.  You've got about 2 months left to work on ideas!)

So, from my family to yours- Happy Valentine's Day! I hope you are inspired to create your own personalized card to send out.  (O:

I am linking up to Fun Friday Finds - Go check out all the great ideas being posted today!

Tuesday, January 24, 2012

L.O.V.E. :: Scrabble Tile Pillow Covers

Good Morning!

I have been meaning to post about one of my favorite items I made as a Christmas gift this past year and today is the day!  My sister and I decided to do a "Pinterest Christmas" and make each others gifts based on our favorite pins.  We both are a little addicted to Pinterest (Okok, maybe only I am addicted, but anyway!).  It was really fun to watch as Clare posted new pins and I would "like" them instead of repinning to keep her from knowing which ones I intended to make.  I am glad I waited until now to write about this, because this craft is super fitting with Valentine's Day just around the corner.  What better gift (or just a decoration for yourself) than a set of these Scrabble Tile Pillow Covers:

These pillow covers do require a teeny bit of sewing knowledge, but are really quite easy!  To keep costs down, I used muslin to resemble the wood tone of scrabble blocks and black cotton fabric for my letters.  Because the muslin was so thin, I had to use 2 layers for the pillow form, to make sure the pattern on my recycled pillow forms didn't show through.  But even with doubling the amount of fabric needed, the cost was still less than purchasing a more expensive cotton fabric.

Supplies:
*Fabric for pillow covers- amount will depend on the size of your pillows (I used roughly 4 yards)
*Black fabric for scrabble letters and numbers
*Black embroidery thread and needle
*Iron-on adhesive
*Scissors and/or rotart cutter, ruler and cutting mat, sewing machine w/thread
*Four square pillows (Mine were 15x15)

I am sorry in advance, because I have no pictures to go along with this tutorial.  :(  When I was putting these together, I didn't really intend to use them as a tutorial post.  But, I really regret that...hopefully the instructions are easy to follow, sans photos.

Instructions:

1.  Cut all the pieces of the pillow covers.  Instead of reinventing the wheel here, check out THIS tutorial.  It gives clear directions and is one of the best tuts for envelope pillow cases I have come across.  (If you choose to use muslin, as I did, you will need to cut double for each piece of each pillow.)  **DO NOT sew your pillow covers together yet- we have to add the letters first! (O:

2.  Prepare your letters and numbers.  Whenever I work on an applique project, I use Word to print my letters/numbers/shapes/etc.  Look through the fonts your computer has and pick one that is very plain and most closely resembles the letter from actual scrabble tiles.  The size you choose will depend on what size your pillow are.  I wanted mine to be very prominent, so they were roughly large enough to fill one sheet of paper per letter.  I typed all 4 numbers on a separate sheet, at a much smaller size.

3.  Trace your letters and numbers onto the paper side of the iron-on adhesive- Letters and Numbers BACKWARDS!  Yes, I just used caps and an exlamation point...I have been doing little applique projects for a couple years now and I still mess this up from time to time.  It's a really aggrevating "oops" and I don't want you to pull any hair out during this project. ;-)

4.  Iron your black fabric to the iron-on adhesive.  Once cool, cut out all letters and numbers and remove the paper backing.

5.  Iron your letters and numbers to your front fabric pieces.  I tried to be as scientific as I could, regarding getting the letters centered and the numbers all about the same height from the bottom.  You may not be as OCD as I am, so this might not bother you.  If not, just eyeball your letters and numbers, then iron into place. 

6.  Once you have all 4 square fronts ironed beautifully, it is time to stitch.  I don't have an applique machine so I do all mine by hand.  (I honestly prefer the quaint look it gives- something basic but pretty).  I like to use 2 strands of embroidery thread for a little extra thickness.  Do a basic running stitch along the edges of all the letters and numbers.

7.  Sew your pillows!  Refer back to THIS tutorial to complete the sewing part of this project.  My OCD kicking in again, but I was mindful to make sure all the envelopes were sewn to open in the same direction.

I had such fun making these for my sister and I knew she would love them.  One little side story about this gift that still makes me laugh:  I had asked my sister for advice on where to find cheap pillow forms for a "Christmas gift for my mother-in-law" and she said she had a set of 4 pillows I could have for the project.  I could barely contain my excitement waiting for her to open these pillows and realize that she GAVE me the pillows to make HER Christmas gift.  Haha, too funny.

I hope you found this (pictureless) tutorial helpful and good luck with your own version of these pillows!  I would love to see what you create!  (O:

*I am linking up to this great Pinteresting Party #23!  Go check it out for loads of other great ideas!

Wednesday, January 18, 2012

Friends, Flowers and Fun!

How are those for 3 Fabulous F's?  Now there are 4!  ;-)

This past weekend I enjoyed a great Saturday with 10 beautiful ladies and a couple of our kiddos.  As I mentioned here, my sister, momma and I are working on a really cool quilt for me to take to Saipan this July.  My sister had the awesome idea of asking all my friends and family to be a part of this project by helping to make the fabric and/or crochet flowers to cover the front of the quilt.  What a cool idea!  I love that I'm taking little bits of my favorite people half way around the world.  It will be a great comfort to have on tough days and a pleasant reminder every day of the relationships and encouragement I have so far away.

My friend Margo, was gracious enough to open her home for our Crafty Friend Day!  We invited lots of lovely ladies to join us for a few lessons on flower making, chatting with friends, and yummy snacks.  Many of my friends were aprehensive about their levels of craftiness, but I assured them were many options that were all relatively easy.

I caught a few photos of my girls hard at work! (Erin came after I had already put my camera away, but she was there too!)  (O:

Sherry, Lacey, Margo and Michelle  (Michelle and Sherry drove 2 hours to join us!)

Elise and Jessca

Alyssa, Brooklynn, and Clare

Neely

Once we were all finished with our flowers, we laid them out on the sheet I'll be using to get an idea of what it will look like.  There are still many flowers to create, but I love how it is coming together!


On my way home after this super fun day, I really got lost in my thoughts about how thankful I am for these ladies.  God has blessed me with an amazing group of friends and it is sometimes overwhelming to think about how much we all mean to each other.  Like I said before, many of them weren't all that excited about making a flower, but they still came and tried (and Did Great!).  Because they knew it was important to me.  What God reminded me in that moment is that it doesn't matter where we live, only that we love.  I know I will use this quilt often while on Saipan and I cannot wait to get lost in fun memories of each friend who helped put this quilt together.  Once we are a little closer to completion, I hope to do another post remarking of the specialness of each and every one of these awesome ladies (and anyone else who contributes between now and then).  It will be a great reminder of the great people in my life.  While I may not be blessed with a good enough memory, I am Totally blessed with the best of friends!!

Wednesday, November 2, 2011

PDLB: Car Caddy!

I was really excited when I came across THIS awesome pin for a Car Caddy.  My nephew turns 2 this month and is really into playing with cars.  I mean, this is the kid you cannot get to sit still for Any.Thing, but he will lay on his little belly forever pushing his cars around on the floor.  I think this will be perfect for him- during church, at a restaurant, etc.  I hope he likes it as much as I do! (O:

Homemade by Jill is just an absolutely fantastic blog- she is SO creative and shares all her great ideas for free!  I knew when I saw this tutorial was by her, I would be in good hands.  I decided to use duck cloth for the inside and outside instead of jeans, but it turned out just as great.  I might suggest making the yellow dashes just a little bit wider...I had trouble sewing them on securely.

The only thing I really feel like I want to note (everything else can be found on her tutorial post, it's described perfectly!), is how to use piping around edges.  This was my first piping experience, and she is probably a pro at it.  That is probably why she didn't elaborate on how to do it...but, after a quick call to my sister, I had it all figured out.  So, just in case you are like me and have no idea...see the picture below for how to get around those pesky little edges.  (O:

Snip a few small cuts around the edge to help guide the piping in the right direction.  Pin securely into place.

I opted to keep Law's car caddy a little more simple, no paint and no applique.  That way he can continue using it for years, without any parts of it seeming too "baby" at any given point.  (For the record, I love the car applique and it might have been more laziness than anything that kept me from decorating further.  But also, his parents don't always like that type of thing.  So I knew I couldn't go wrong with classic colors.)

It is such a fun feeling to mark things off the "To Pin" list!!  Even more exciting is being able to hand make gifts for my loved ones.  There is something so sweet and special about it.  (O: