Happy Tuesday!
I am so excited to share this “Pinned It. Did It. Loved It. Blogged It.” post with you!!
It was a couple weeks in the making- since I had to work on it here and there between everything else going on right now…I was finally able to take little Miss Emilia out to the park this past Sunday to snap some photos of our finished product, and now I can share it with you! (O: ALSO, I doubled my PDLB points for today by completing another pin...Check out this
Pinterest Challenge going on today. There are OODLES of great ideas being shared. Look at us Pinners actually Doing! (O:
The first time I saw
THIS scrap tutu pinned, I knew we just had to make one.
I have an over-abundance of fabric that I’m looking for ways to use, since it can’t come with me to
Saipan next summer. (sad face).
One fabric in particular, I have been waiting for the perfect project to use it on.
You’ll see it in the pics- the sweet owl fabric!
I just love love love it.
So, I grabbed all the pinks and oranges I had to coordinate with this print.
I decided I could use this tutu in her fall photos as well as maybe some photos for Christmas cards.
(Which involved another pinned idea…Have I told you lately how much I love Pinterest!!)
My daughter, Emilia is 2 and ½ and LOVES to help. When I told her I had a new project for us to work on together, her eyes lit up! To keep her out of reach of the scissors while I cut the strips, I asked her to look through all the fabrics and pick her “favorites”. (She didn’t really know I was planning to use them all, but she had a blast unfolding them, stacking them, straightening them, etc.)
On to the tutorial:::
I spent a little time googling to find out how wide to make the strips, etc.
THIS is the blog I ended up getting my information from.
Very helpful and cutie little girl! (O:
Supplies::
Scrap Fabric (Coordinating colors or just whatever you have laying around)
Elastic (½ to 1 inch width)
Scissors (Pinking Shears will keep the fraying down)
Needle/Thread or Sewing Machine to sew waistband
Directions::
- Gather and iron your scraps. (The tutorial I read just used assorted scraps. I preferred to coordinate my fabrics for a more cohesive looking skirt. This is definitely the OCD coming out in me, but since I knew I would be using it for pictures, I wanted it to a little more coordinated.)
My little Helper piled these up for me. ;-)
Cut your scraps to roughly 22 inches long and about 1.5 inches wide.
My daughter’s waist is about 18 inches and I used somewhere around 60 strips.
You can adjust this number depending on the fullness you want to create.
(
I am a horrible straight-line cutter. I took pictures of the little trick I used to help me eye up the straight lines: Fold your fabric in half long-ways, so you have the end where you will begin cutting as well as the side where you will end. Snip a small cut through all the layers. When you unfold the fabric again to cut, you can use the snip at the other end as a guide for keeping semi-straight cuts. I cut all my snips while the fabric was folded in half and then I just cut all the strips out following my little guides.)
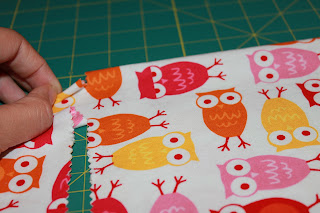

- Sew the elastic waistband- by hand or with machine. Either way you choose, I would recommend going over it several times- depending on how rowdy your little girl can get. ;-) (My daughter’s waist is 18 inches, so I cut at about 19 in order to have enough elastic to overlap and sew. Also, I usually make the waistband a tad smaller than her waist actually measures to help keep it snug.)
Double knot each scrap around the elastic- trying to keep the center of the strip at the elastic so you have even sides.
*Remember to do this loosely, so you don’t stretch out the elastic.


- Continue all the way around the elastic. Once you have all the strips you want to add, you can trip long pieces as needed to even up the tutu.

- Take Little Miss outside and let her twirl to her heart’s delight! (O:


I would love to see your scrap tutu creations!! (O:
*This tutu will fray, but that just adds personality.
*It is not recommended to wash this tutu in a washing machine.


